
Before & After photos are important for managers to gauge how in-store products look.
* You may be asked to submit a variety of photos. Please ensure that each photo is uploaded in the correct space.
1. After you tap Add + Photo, you can either Take A Photo or Choose A Photo.
Camera Image = Opens up your device's camera application
Gallery Image = Opens up your device's image gallery
2. If you tap on the Camera image, then you'll use your device's camera to take a photo.
If you tap on the Gallery image, then you'll use your device's image gallery to select a photo.
3. Once your Before photo has been saved, fix the display if necessary. This includes reorganizing, cleaning, and adjusting the items.
In the example below, the Brand Rep closed all shoe boxes and arranged them by size.
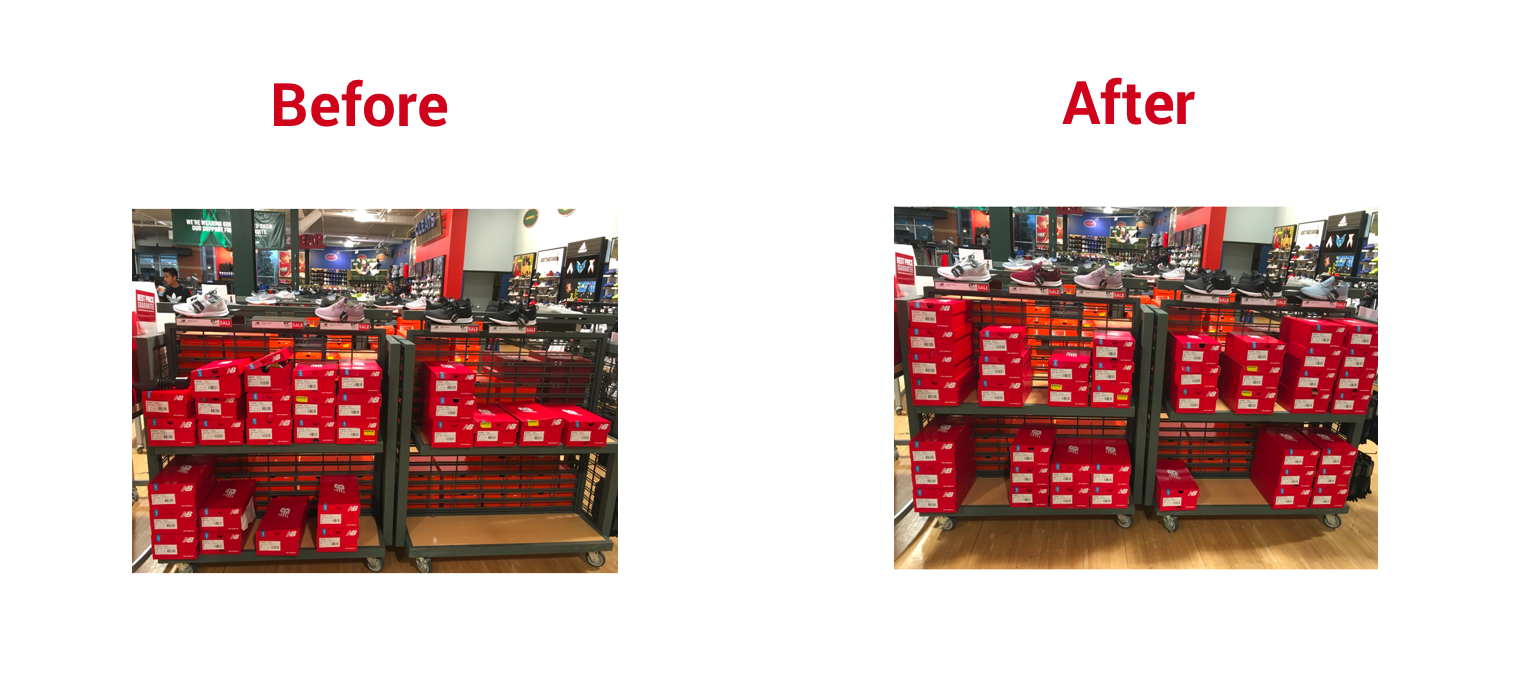
4. Back in the application, tap on Add + Photo in the box over After to take a photo of the updated display.
5. Once again, select whether you want to use the Camera or choose a photo from the Gallery.
After a photo is selected, it will be categorized as After under the description of the image. Tap Save to confirm.
6. Your photos should now be linked as Before & After photos. If you need to delete and redo your photos, tap on the red circled x in the upper right corner of the image.
7. Select the red No Photo? button below the photo box when you do not have an image to add for that question. This will allow you to submit the report when an image is not available.
Comments
0 comments
Article is closed for comments.